Build A Static-Website Generator With Elixir, Part 1
This is one of our longer posts, so we’ve included a table of contents.
Table of Contents
- Introduction
- Incremental Development Concepts
- Iterative Development Concepts
- Initial Planning
- Deliverables
- Initialization
- Planning
- Requirements
- Analysis & Design
- Implementation
- Testing
- Deployment
- Evaluation
- Project Control List
- New Tasks
- Completed Tasks
- Conclusion
Introduction
We want to build the world’s simplest static-website generator. Also, we want to use an iterative and incremental development method to do it. Finally, we want to use the Elixir programming language. Before we dive in, here’s an extremely short primer on iterative and incremental development processes. We will combine these two ideas as we build this project.
Incremental Development Concepts
- The system is broken down into small pieces
- Requirements are worked through in order of priority
Iterative Development Concepts
- The entire software development lifecycle is traversed in each iteration
- Initialization, the initial “iteration”, builds a base version of the system
- All tasks and priorities are tracked in a Project Control List
We are now in the initialization phase. We will go through each of the seven iteration steps to build a minimum base system.
- Planning
- Requirements
- Analysis & Design
- Implementation
- Testing
- Deployment
- Evaluation
Initial Planning
Deliverables
Functional Requirements
- A way to publish written work online (ie blog)
Non-Functional Requirements
Must use Elixir
We love Elixir and functional programming.
Must be as simple as possible
It’s got to be dead simple. The app and the code. It’s so easy to get carried away and over-engineer. Simplicity is a must-have requirement.
Must use an iterative and incremental development method
In other words, short feedback loop/development life-cycle. Rather than releasing a minimum number of features as “version 1”, we implement the smallest useful feature possible and release immediately.
Initialization
Planning
We want to deliver the smallest increment of functionality possible,
so we’re going to start simple. We will first add an
index.html serves as the initial page for our static
website. Then, we will add a development server to serve the site to
ourselves so we can see how it looks before we deploy it live.
Requirements
Functional
- Post written text online
This is the essence of the deliverable. Posting written text online is the first functionality we will deliver.
Non-functional
- A way to see what the output will look like locally before it is deployed
This will make our lives easier during development and shorten the feedback loop.
Analysis & Design
Analysis
The smallest bit of functionality we can offer is a static website with a single HTML file. We actually made a proof of concept that does exactly this already and described the process in detail in an earlier post. If we can add a development web server, that will pretty much meet all of our requirements.
Design
We could list our posts in a single HTML file, sorted in descending order of date, so that the most recent posts are at the top. Readers should have to scroll down to see older posts.
Ideally, each post would have a title, a short message, and the date it was posted. The text should not stretch across the whole viewport on a wide screen, but should wrap at a point that facilitates readability. The markup should be well-structured and valid. The column of text should be centered in the viewport but the text itself should be left-aligned.
Name
We’ve chosen “Serval” for the project name.
Implementation
1. Create a new Mix project
We’re going to need a supervisor to start our development server
later when we add it, so we use the --sup option when we
run the mix new command to generate our initial project
files. We can refer to our explanation
of this command previously, if necessary.
$ docker run --rm -w /opt -v $PWD:/opt -u $(id -u):$(id -u) elixir mix new serval --supThen, we initialize Git in our project directory.
$ cd serval
$ git init
Configure the user name and email, if necessary.
$ git config user.email "webdevcat@proton.me"
$ git config user.name "Catalin Mititiuc"
Lastly, create the initial commit.
$ git add .
$ git commit -m "Initial commit"
2. Create a GitHub repo
After creating the remote repo on GitHub, we add it as the origin and push up our initial commit.
$ git remote add origin git@github.com:webdevcat-me/serval.git
$ git push -u origin master
3. Add an
index.html file to the root directory
Just a simple HTML boilerplate, for now.
index.html
<!DOCTYPE html>
<html lang="en">
  <head>
    <meta charset="UTF-8">
    <meta name="viewport" content="width=device-width, initial-scale=1.0">
  </head>
  <body>
    <h1>Hello, Serval!</h1>
  </body>
</html>
4. Add a Dockerfile
As we’ve mentioned before, we heavily favor using Docker for our
projects when possible. We can copy the
Dockerfile from our proof of concept app, but since we
added a new file, index.html, we need to add a
COPY command for it as well.
Dockerfile
FROM elixir:slim

WORKDIR /opt
COPY lib ./lib
COPY mix.exs ./mix.exs
COPY index.html ./index.html

ARG MIX_ENV=dev

RUN mix deps.get --only $MIX_ENV && mix build
5. Add a Mix task for building the site
We can start with a copy of lib/mix/tasks/build.ex from
our concept app, as it already mostly does what we want. Our build
task isn’t really going to “build” anything, just yet. For now, it’s
just going to copy our index.html file from our app’s root
directory to the /public directory in the Docker container.
We’ll build on this later to make it more dynamic.
First, we want to add a variable for the output directory to the
application environment. We do this in the application()
function of the mix.exs file, as per the documentation
for the mix compile.app command.
mix.exs
  def application do
    [
      ...
      env: [output_directory: "/public"],
      ...
    ]
  end
Next, after we copy over lib/mix/tasks/build.ex from our
proof-of-concept app, we can remove the @markup module
attribute because we want the output directory to contain the contents
of the index.html file from our root directory.
Let’s add a module attribute for our filename
@filename "index.html"and replace the last line in run() with
def run(_args) do
  ...
  File.cp!(@filename, Path.join(output_directory, @filename))
end
And let’s not forget to update the app name in the call to
fetch_env():
output_directory = Application.fetch_env!(:serval, :output_directory)Here’s what the build task looks like. We also updated the
@moduledoc to reflect the changes in the task, as well as
updated and added shell output to inform us when the task finishes.
lib/mix/tasks/build.ex
defmodule Mix.Tasks.Build do
  @moduledoc "Creates a /public directory and copies an HTML index file from the root directory there"
  @shortdoc "Builds static HTML file"

  use Mix.Task

  @filename "index.html"

  @impl Mix.Task
  def run(_args) do
    Mix.shell().info("Building markup...\n  " <> @filename)

    output_directory = Application.fetch_env!(:serval, :output_directory)

    File.mkdir_p!(output_directory)
    File.cp!(@filename, Path.join(output_directory, @filename))

    Mix.shell().info("Done.")
  end
end
So far, everything is pretty much just like our concept app that we’re using as a reference. To make sure there aren’t any problems, let’s try building our Docker image.
$ docker build -t serval_dev .And now let’s start a container and check the contents of the HTML
file in /public.
$ docker run --rm -w /opt -v $PWD:/opt serval_dev bash -c "mix build && cat /public/index.html"
Building markup...
  index.html
Done.
<!DOCTYPE html>
<html lang="en">
  <head>
    <meta charset="UTF-8">
    <meta name="viewport" content="width=device-width, initial-scale=1.0">
  </head>
  <body>
    <h1>Hello, Serval!</h1>
  </body>
</html>
So far, so good! Let’s add these Docker commands to our
README.md for future reference.
README.md
# Serval

The world's simplest static-website generator!

## Build Docker image

    docker build -t serval_dev .

## Build static site

    docker run --rm -w /opt -v $PWD:/opt serval_dev mix build
Since we expanded on the build task that we copied from
our reference project, next we’ll add a test for the new
functionality.
6. Add a test for our Mix build task
To start, our POC app has a
test for the Mix build task we can copy over to our
project in test/mix/tasks/build_test.exs. We’ll want to add
a new test case to cover the changes we’ve made.
test "updates output files"First pass
To test that our Mix task is updating the output files, we first need to create them so they exist already before the task runs. We need to create two fixtures in our test. The first is the file already existing in the output directory, and the second is the file in our root directory that will replace it when we run our build task.
  test "updates output files", %{output_dir: output_dir} do
    output_path = Path.join(tmp_path("build"), output_dir)
    File.mkdir_p!(output_path)

    File.write!(Path.join(output_path, "index.html"), """
    <!-- Auto-generated fixture -->
    <!DOCTYPE html>
    <html>
      <body>hello world</body>
    </html>
    """)

    File.mkdir_p!(tmp_path("build"))
    File.cd!(tmp_path("build"))

    File.write("index.html", """
    <!-- Auto-generated fixture -->
    <!DOCTYPE html>
    <html>
      <body>welcome</body>
    </html>
    """)

    capture_io(fn -> Mix.Tasks.Build.run([]) end)

    assert File.read!(Path.join(output_path, "index.html")) =~ "welcome"

    File.cd!(__DIR__)
  end
Refactoring
De-duplicate fixture
Both tests in our file now need to use an index.html
fixture, so we can move that markup into a module attribute,
@markup, to avoid duplicating it in both tests.
  @markup """
  <!-- Auto-generated fixture -->
  <!DOCTYPE html>
  <html>
    <body>hello world</body>
  </html>
  """
  ...
  test "creates output file", %{output_dir: output_dir} do
    ...
    File.write("index.html", @markup)
    ...
  end

  test "updates output files", %{output_dir: output_dir} do
    ...
    File.write!(Path.join(output_path, "index.html"), @markup)
    ...
  end
De-duplicate directory setup
Next, both our tests require setting up a temporary directory.
    File.mkdir_p!(tmp_path("build"))
    File.cd!(tmp_path("build"))
    ...
    File.cd!(__DIR__)
The official Elixir code repository has a
test helper called in_tmp() that does exactly this. We
can copy that function into our test file. We’re actually already using
the function that it calls, tmp_path(), in our code. 😁
  defp in_tmp(which, function) do
    path = tmp_path(which)
    File.rm_rf!(path)
    File.mkdir_p!(path)
    File.cd!(path, function)
  end
And now we can remove the temp directory setup from our tests, and
just wrap them in a call to in_tmp().
  test "creates output files", %{output_dir: output_dir} do
    in_tmp("build", fn ->
      ...
    end)
  end

  test "updates output files", %{output_dir: output_dir} do
    in_tmp("build", fn ->
      ...
    end)
  end
And since in_tmp() deletes any existing temp directory,
we don’t need to run our test teardown for every test. And since the
output directory doesn’t change between tests, we don’t need to run our
setup for every test, either. We can just do it all, once per test-run,
by defining our setup block in a call to setup_all()
instead of setup().
setup_all doCleanup
- We use the string
"build"in multiple places, so we can move that into the setup block and pass it into our tests. - We call
Path.join(output_path, "index.html")twice, so we can just call it once in the setup block and pass it to our tests. - We use the string
"index.html"in multiple places. Let’s put that in a module attribute@filename.
Final form
Here’s what the final version of our test looks like.
test/mix/tasks/build_test.exs
defmodule Mix.Tasks.BuildTest do
  use ExUnit.Case

  import ExUnit.CaptureIO

  @filename "index.html"

  @markup """
  <!-- Auto-generated fixture -->
  <!DOCTYPE html>
  <html>
    <body>hello world</body>
  </html>
  """

  setup_all do
    output_dir = "public"
    file_path = Path.join(output_dir, @filename)

    original = Application.fetch_env!(:serval, :output_directory)
    Application.put_env(:serval, :output_directory, "public")

    on_exit(fn ->
      Application.put_env(:serval, :output_directory, original)
      File.rm_rf!(tmp_path())
    end)

    [context: "build", output_dir: output_dir, file_path: file_path]
  end

  test "creates output files", %{context: context, file_path: file_path} do
    in_tmp(context, fn ->
      File.write!(@filename, @markup)

      capture_io(fn -> Mix.Tasks.Build.run([]) end)

      assert File.exists?(file_path)
    end)
  end

  test "updates output files", %{file_path: file_path} = context do
    in_tmp(context[:context], fn ->
      File.mkdir_p!(context[:output_dir])
      File.write!(file_path, @markup)

      File.write!(@filename, """
      <!-- Auto-generated fixture -->
      <!DOCTYPE html>
      <html>
        <body>welcome</body>
      </html>
      """)

      capture_io(fn -> Mix.Tasks.Build.run([]) end)

      assert File.read!(file_path) =~ "welcome"
    end)
  end

  defp tmp_path, do: Path.expand("../tmp", __DIR__)
  defp tmp_path(extension), do: Path.join(tmp_path(), extension)

  defp in_tmp(which, function) do
    path = tmp_path(which)
    File.rm_rf!(path)
    File.mkdir_p!(path)
    File.cd!(path, function)
  end
end
Let’s try running our test.
$ docker run --rm -w /opt -v $PWD:/opt serval_dev mix test
....
Finished in 0.05 seconds (0.00s async, 0.05s sync)
1 doctest, 3 tests, 0 failures
And let’s not forget to add this Docker command to the
README.
README.md
...
## Run tests

    docker run --rm -w /opt -v $PWD:/opt serval_dev mix test
We still need to add some markup and styles to our index
file, but without a web server to show us the content, making and
verifying changes will be tedious. Let’s now focus on the development
server and then we’ll come back around to markup and styling.
7. Add a web server for development
To add our development web server, we can take a look at the Plug library documentation, as it provides a nice example to get us started.
We add plug_cowboy to deps() in our
mix.exs file. Since the web server will only run during
development, we use the only: :dev option.
  defp deps do
    [
      {:plug_cowboy, "~> 2.0", only: :dev},
    ]
  end
Next, we copy the example plug module from the Plug documentation to
lib/serval/plug.ex.
lib/serval/plug.ex
defmodule Serval.Plug do
  import Plug.Conn

  def init(options) do
    # initialize options
    options
  end

  def call(conn, _opts) do
    conn
    |> put_resp_content_type("text/plain")
    |> send_resp(200, "Hello world")
  end
end
We can update lib/serval/application.ex to start our web
server under a supervisor when the application starts. We’ll also add a
call to our build task to make sure we’re not looking at a stale page on
startup.
lib/serval/application.ex
defmodule Serval.Application do
  @moduledoc false

  use Application
  require Logger

  @impl true
  def start(_type, _args) do
    Mix.Tasks.Build.run([])

    children = [
      {Plug.Cowboy, plug: Serval.Plug, scheme: :http, options: [port: 4000]}
    ]

    opts = [strategy: :one_for_one, name: Serval.Supervisor]

    Logger.info("Plug now running on localhost:4000")

    Supervisor.start_link(children, opts)
  end
end
Now, we can test our development server. First, we fetch our new dependencies with:
$ docker run --rm -w /opt -v $PWD:/opt serval_dev mix deps.getThen, we can start the application. Since we want our server to stay
running until we stop it, we use the --no-halt option. We
also need to publish a port, since our browser is connecting to a server
inside a container. The -p 4000:4000 option binds the
container’s port 4000 to port 4000 on our
system.
$ docker run --rm -it -w /opt -v $PWD:/opt -p 4000:4000 serval_dev mix run --no-haltIt’s going to ask to install hex and then
rebar.
Mix requires the Hex package manager to fetch dependencies
Shall I install Hex? (if running non-interactively, use "mix local.hex --force") [Yn]
...
Could not find "rebar3", which is needed to build dependency :telemetry
Shall I install rebar3? (if running non-interactively, use "mix local.rebar --force") [Yn]
...
==> serval
Compiling 4 files (.ex)
Generated serval app
Building markup...
  index.html
Done.

01:26:30.509 [info] Plug now running on localhost:4000
And when we visit localhost:4000, we should see a “Hello
world” message in plain text.
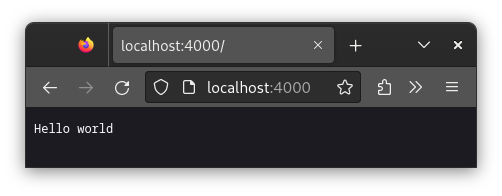
Great! So our web server is running and responding to requests!
Before moving on, let’s update our README with some new
Docker commands.
README.md
...
## Run development server

### First, fetch the dependencies

    docker run --rm -w /opt -v $PWD:/opt serval_dev mix deps.get

### Start the server

    docker run --rm -it -w /opt -v $PWD:/opt -p 4000:4000 serval_dev mix run --no-halt

Visit `localhost:4000` to view.
8. Serve files from the output directory
Our development web server currently responds to every call with
“Hello world” in plain text. Now, lets see about making it serve our
file from the container’s /public directory.
We update lib/serval/plug.ex to get the output directory
path from the application environment variable.
  def call(conn, _opts) do
    path =
      :serval |> Application.fetch_env!(:output_directory) |> Path.join("index.html")
    ...
Then, we replace the call to send_resp with
send_file and pass the MIME type "text/html"
instead of "text/plain" to the
put_resp_content_type() call.
    ...
    conn |> put_resp_content_type("text/html") |> send_file(200, path)
  end
Now when we start the development server, we should see the contents
of the index.html file from our project root.
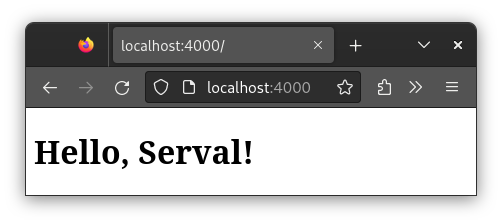
If we make a change to index.html, we will not
immediately see the results by refreshing the browser. We will first
have to run our build task before we can see the new output. Since we
added a call to the build task in
lib/serval/application.ex, we could see the changes by
simply restarting the dev server. To see the changes without restarting,
we first need to find the name of the container running our app with
docker ps. Then we can run a command in that container like
so:
$ docker exec CONTAINER_NAME mix buildAfter that, refreshing the browser should show us any changes to
index.html. That’s also another one to add to
README.md.
README.md
...
## View changes

To see updates made to `index.html`, simply restart the dev server. To see changes without restarting, first find the name of the running container with `docker ps`. Then, run:

    docker exec CONTAINER_NAME mix build
9. Rebuild the docker image
So, our dev server is running and it is serving the
index.html file from our root directory. Awesome!
If you have stopped and started the dev server a few times, you will
notice that it asks to install Hex each time. Because we always run our
commands in a new container, the Hex installation doesn’t get saved
between stops and restarts. Since our Dockerfile fetches
dependencies and calls the build task, all we need to do to fix the
issue is rebuild our Docker image.
$ docker image rm serval_dev
$ docker build -t serval_dev .
Now when we start our app, we will no longer receive the
Shall I install Hex? prompt.
$ docker run --rm -it -w /opt -v $PWD:/opt -p 4000:4000 serval_dev mix run --no-halt
Building markup...
  index.html
Done.

03:24:57.061 [info] Plug now running on localhost:4000
10.
Avoid compiling the dev server in :prod (and running it in
:test)
We don’t require any dependencies in production, but we do compile
code that still refers to those non-existent dependencies. We have to
edit mix.exs to ensure that our web server code is not
compiled and our application is not started in production.
def project do
  [
    ...
    elixirc_paths: elixirc_paths(Mix.env()),
    ...
  ]
end

def application do
    ...
    mod: mod(Mix.env())
  ]
end

defp elixirc_paths(:prod), do: ["lib/mix/tasks"]
defp elixirc_paths(_), do: ["lib"]

defp mod(:dev), do: {Serval.Application, []}
defp mod(_), do: []
12. Update markup
Now that the dev server is working, viewing changes to our markup is much easier. We can go about improving what we have of our static website so far to make it more presentable.
Our design calls for “title, a short message, and the date”. Since we are building the world’s simplest static-website generator, the simplest thing we can think of is a heading, a paragraph, and a date:
We’re going to keep it extremely simple. What is the smallest amount of information we can convey that is going to be useful? A page header would be good, so readers have something to identify us with. And then a heading, date, and a paragraph to satisfy our design.
  <body>
    <header>
      <h1>Page Heading</h1>
    </header>

    <main>
      <h2>Post Heading</h2>
      <time datetime="2020-01-01">Jan 1, 2020</time>
      <p>Lorem ipsum dolor sit amet, consectetur adipiscing elit.</p>
    </main>
  </body>
After restarting our server, we can see our changes in the browser.
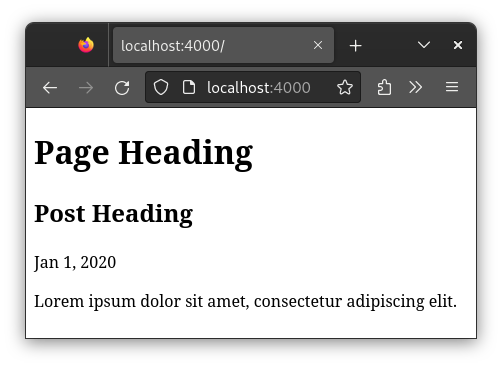
This is enough to get us started. Let’s add some styling.
13. Add styles
We’re going to use white-space as much as possible do delineate different sections.
Styling is pretty subjective, and we’re still early in this project,
so we don’t want to spend too much time on the appearance now. We just
want to make the text a bit more readabale. We add our style directly to
the head of the index.html file. We will break the styles
out into their own file later, for now we just want to do the minimum to
initialize the project base.
Here’s what we’ve added to the bottom of the
<head> section in index.html:
    ...
    <link rel="stylesheet" href="//fonts.googleapis.com/css2?family=EB+Garamond&family=Pathway+Gothic+One" type="text/css" media="screen" />
    <style>
      body {
        font: 1.2em/1.5em 'EB Garamond', serif;
        padding: 5px;
      }

      body > main {
        max-width: 31.5em;
        margin: 0 auto;
      }

      body > header h1 {
        margin-top: 0;
        margin-bottom: 0.3em;
      }

      h1, h2 {
        font-family: 'Pathway Gothic One', sans-serif;
      }
    </style>
  </head>
We can now see what our styles look like in a few different viewport widths. We want to make sure to test both super-narrow, for small mobile screens, and super-wide, for wide monitors.
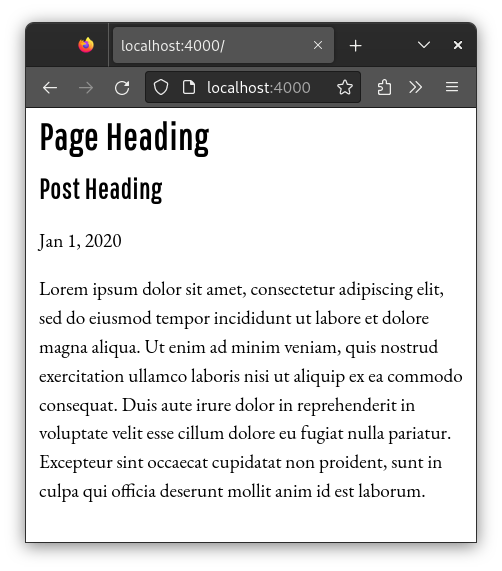
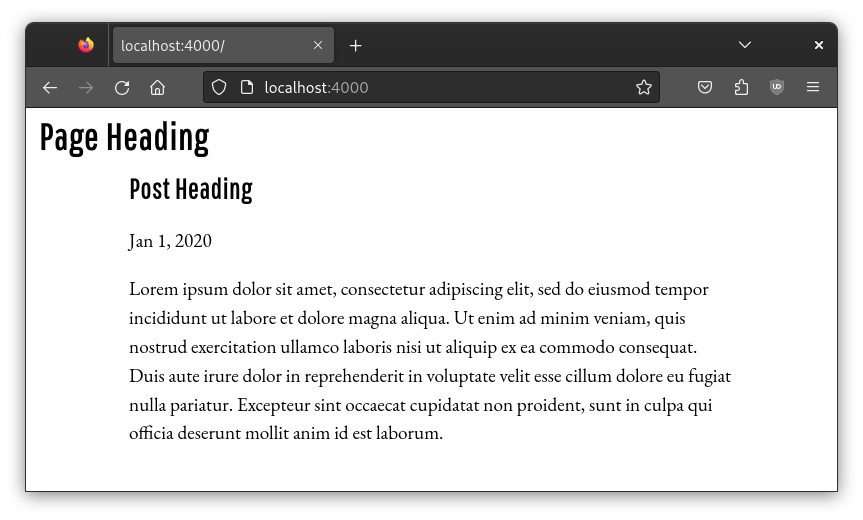

Our goal is legibility, and that looks well-legible enough to get us started.
Testing
Testing so far is pretty straight-forward: either our
index page is viewable or it isn’t. We’re going to set up a
staging environment to ensure that it’s viewable once we deploy it.
Deploy to a staging environment
We already described our deployment process in the earlier post about the proof-of-concept for this project. We’re going to follow the same steps to deploy Serval, but first we want to create a separate resource for staging, so that we can look everything over one last time before we commit to deploying for production.
One difference from our POC instructions is, after we add our GitHub repository, DigitalOcean detects two resources: a Static Site and a Web Service. We want to delete the the Static Site resource and continue with the deployment steps using the resource that was detected as a Web Service.
- For our Resource Name, we used, simply,
staging. - We also want to set an HTTP Request Route for something like
/staging, because the root route/will be for production. - On the info screen, we change the default app name to
servaland click “Next”. - Then we finish up by clicking “Create Resources”.
If all goes well, when deploying finishes, we should be able to visit
the /staging route of the URL DigitalOcean gives for our
app. Something like:
https://serval-abc12.ondigitalocean.app/stagingIf everything looks alright, we can tag the release and proceed to deploying a production version.
Tag the release
And that’s it! With our requirements met, we are ready to release. Let’s add a tag to our repository to mark the release version and push it up to our remote repo.
$ git tag v0.1.0
$ git push origin v0.1.0
Deployment
Deploy to a production environment
To deploy our production version of Serval, we’re going to create a new resource for the DigitalOcean App we just created.
- Go to the DigitalOcean Apps page.
- Click on the Serval App. We named ours, appropriately,
serval. - Click on “Create” and select “Create Resources from Source Code” from the menu.
- As before, select our Serval repository.
- As with our staging process above, it will detect two resources. We want to delete the Static Site one and edit the Web Service one as before.
- We set our resource name as
production. - Change the resource type from Web Service to Static Site and click “Save”.
- Again, we want to set our output directory to
/publicand click “Save”. - Make sure we add a root route,
/, under HTTP Request Routes and click “Save”. - If we added a
MIX_ENVwith a value ofprodunder Global when deploying the staging resource, the we won’t have to do anything else on the Environment Variables screen. Otherwise, we should make sure we add it, either under Global or under “production”. - And if everything looks alright on the Review screen, we click “Create Resource”.
Once deployment finishes, our App will have two components: a “staging” one and a “production” one. We can now visit our production app at the URL DigitalOcean provides (or a custom URL, but that is outside the scope of this post).
Evaluation
We’ll now take a moment to consider our project so far. On the functional side, what’s most obvious is that we’re not really “generating” anything, we’re still just editing raw HTML. We’ll adress this point soon.
On the non-functional side, two things in particular stick out in our minds.
- Having to run the build task to see a development change is repetitive and time-consuming
- Having to refresh the browser to see a development change is, again, repetitive and time-consuming
The consequences of having to do these repetitive steps over and over are a slower feedback loop and a longer development cycle. Luckily, these sorts of issues are easily remedied with a little automation. That sounds like a great next-step for this project and a great addition to our Project Control List.
Project Control List
Here’s what we’ve accomplished in this iteration, and what we look forward to working on in the next one.
New Tasks
- Automate running the build task after code changes
- Automate refreshing the browser after a rebuild
Completed Tasks
And here’s what we’ve accomlished in this initial project step, building on the proof-of-concept we built before.
Add a development web serverAdd a rootindex.htmlfile
Conclusion
We have done the initialization phase and planted the “seed” from which the rest of our app will evolve. So far, we can publish a website with a single page and we can run a web server in our development environment to serve it to ourselves locally. Next time, we will make the build task run automatically whenever our markup changes. We’ll see each other again, then. Take care and happy coding!