Set Up A GitWeb Server
Introduction
Git comes with a CGI script called GitWeb, a simple web-based visualizer. Today we will set up a virtual server on DigitalOcean that will use GitWeb to visualize a Git repository.
1. Create a DigitalOcean droplet
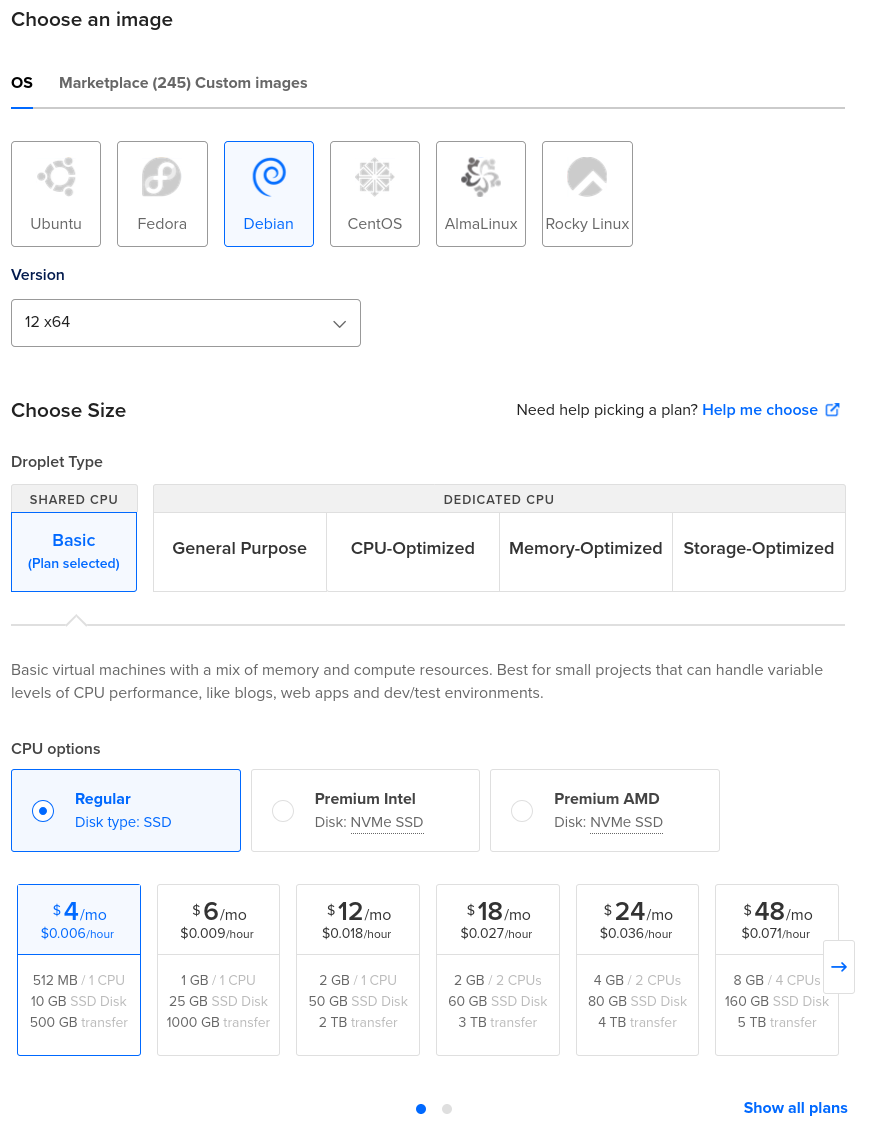
Create a new droplet from the DigitalOcean dashboard. For now, we go with the smallest virtual server currently available. We also add an SSH key so we can authenticate without a password.

2. Log in to the droplet remotely
After the droplet is created, we can see its IP address on the dashboard. We use this IP address to log in to our virtual server:
$ ssh root@XX.XX.XXX.XXX3. Silence locale warnings
After successfully logging in, one of the messages we are greeted with is a warning about the locale.
-bash: warning: setlocale: LC_ALL: cannot change locale (en_US.UTF-8)We can make this annoying message go away by creating a locale file manually:
# localedef -i en_US -f UTF-8 en_US.UTF-84. Add a user account to administer the Git repositories
Next, we create a user account that will administer the git
repositories, so we don’t always have to do it as root.
# adduser git --disabled-passwordWe have to add our SSH key to the git user’s
authorized_keys file.
# su git
$ cd
$ mkdir .ssh && chmod 700 .ssh
$ touch .ssh/authorized_keys && chmod 600 .ssh/authorized_keys
$ exit
# cat ~/.ssh/authorized_keys >> /home/git/.ssh/authorized_keys
5. Install necessary packages
Lighttpd is the default web server that GitWeb tries to use if available. For simplicity, that’s what we’ll use.
# apt-get update
# apt-get install git lighttpd gitweb
6. Configure Lighttpd
We will need to make some changes to Lighttpd’s config file.
# nano /etc/lighttpd/lighttpd.confUpdate the value for
server.document-root:server.document-root = "/usr/share/gitweb"Add
index.cgitoindex-file.names:index-file.names = ( "index.php", "index.html", "index.cgi" )
7. Enable Lighttpd modules
Since GitWeb uses CGI, we will have to enable Lighttpd’s CGI module. We will also need the setenv module. First we need to configure them.
# nano /etc/lighttpd/conf-available/05-setenv.confAdd the following line:
/etc/lighttpd/conf-available/05-setenv.conf
...
setenv.add-environment = ( "PATH" => env.PATH, "GITWEB_CONFIG" => env.GITWEB_CONFIG )
Next, edit the CGI module config file.
# nano /etc/lighttpd/conf-available/10-cgi.confAdd:
/etc/lighttpd/conf-available/10-cgi.conf
...
cgi.assign = (
  ".cgi" => ""
)
Once that’s done, enable mod_cgi and
mod_setenv with:
# lighty-enable-mod cgi setenv
# service lighttpd force-reload
8. Edit the Lighttpd service init files
We need to edit the Lighttpd service startup files to define the
GITWEB_CONFIG environment variable that we used in the
previous step.
# systemctl edit lighttpd.serviceThis will start up an editor and create an override.conf
file. Add the following two lines:
/etc/systemd/system/lighttpd.service.d/override.conf
[Service]
Environment="GITWEB_CONFIG=./gitweb_config.perl"
Then, save the file and exit the editor. To finish, we need to run these two commands:
# systemctl daemon-reload
# service lighttpd restart
9. Upload a Git repository
We are now ready to upload a Git respository we wish to visualize
with our server. First, lets transfer ownership of the respository
directory to our user git we created earlier.
# chown git /var/lib/git/
# chgrp git /var/lib/git/
Now we can log out of the server with exit. On our local
machine, we clone a bare copy of the repo we want to
upload.
$ git clone --bare my_project my_project.gitNow we can upload this bare repo to our server.
$ scp -r my_project.git git@XX.XX.XXX.XXX:/var/lib/gitWe can tell Git to automatically add group write permissions to our repo with:
$ ssh git@XX.XX.XXX.XXX
$ cd /var/lib/git/my_project.git
$ git init --bare --shared
10. Visit the GitWeb server
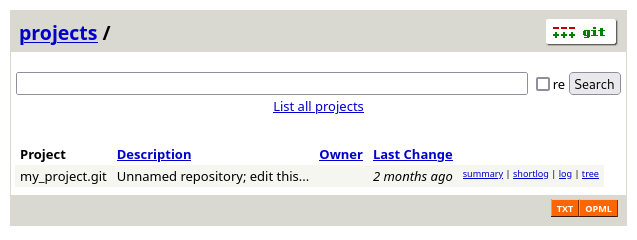
When we visit the server’s IP address with our browser,
http://XX.XX.XXX.XXX, we should see a GitWeb
projects page. We can now explore our project’s code with
our web browser.

Resources
Here is a list of the resources that were used to figure out how to accomplish the task in this post.